Sign up, log in, and launch your organization.
Use this public guide to create a BSMARTER account, sign in, and create the first organization workspace for your team. The screenshots below show the exact screens new users should expect.
What you will complete
Account
Sign up and verify email
Access
Log in securely
Workspace
Create an organization
Ready
Continue into BSMARTER
Three setup steps
Follow the steps in order. Email verification is included in the signup step because it happens before the user can sign in.
Signup / Step 01
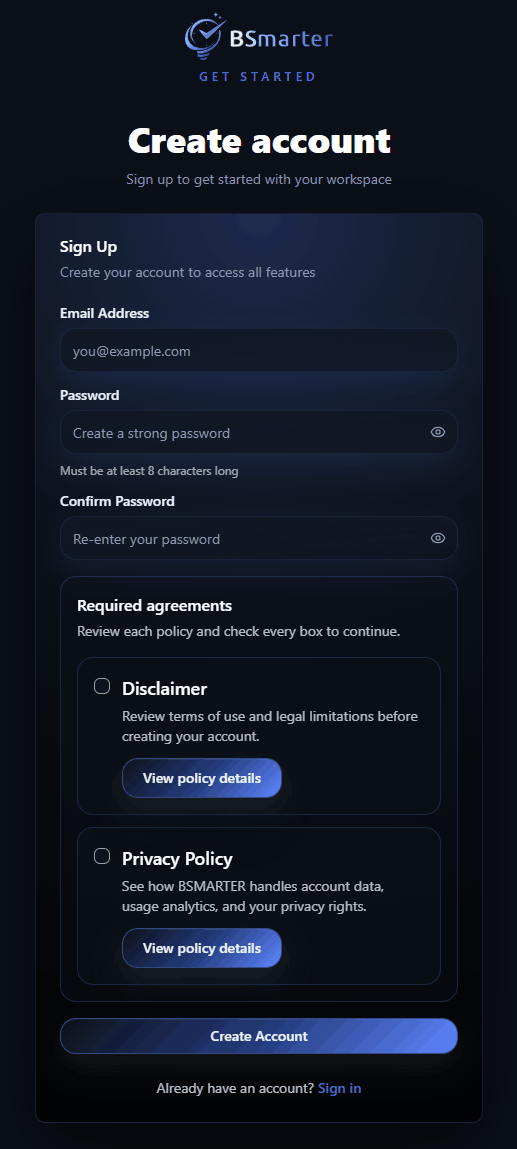
Create your account
Start by creating a secure account and accepting the required platform agreements.
Detailed actions
- 1Enter account detailsAdd your email address, create a password with at least 8 characters, and re-enter the same password in Confirm Password.
- 2Review required agreementsOpen the Disclaimer and Privacy Policy details, review the information, and check both boxes before continuing.
- 3Create and verifySelect Create Account, then open the verification email from BSMARTER and follow the link to activate the account.
Expected result
Once the email is verified, your account is ready to sign in.
The form will not continue until both agreement checkboxes are selected.
If the verification email does not arrive, check spam or junk folders before retrying.
Login / Step 02
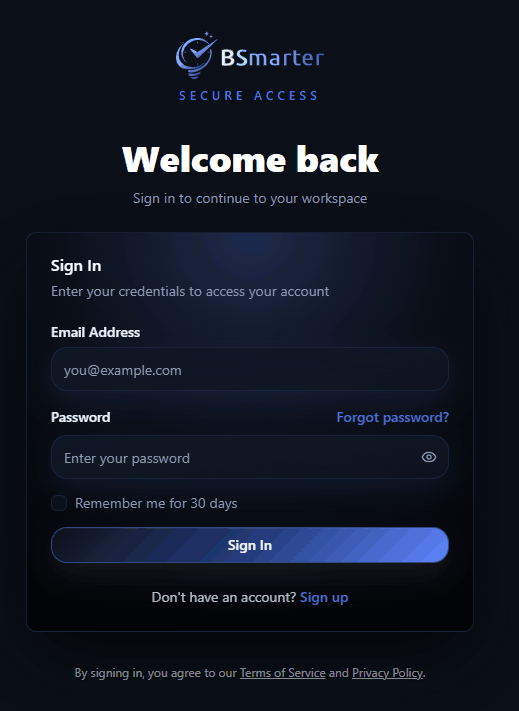
Sign in to your workspace
Use your verified email and password to start the authenticated setup flow.
Detailed actions
- 1Open the login pageGo to Sign In from the signup screen or use the login page directly.
- 2Enter credentialsUse the same verified email address and password created during signup.
- 3Continue securelyOptionally select Remember me on a trusted device, then select Sign In.
Expected result
BSMARTER prepares your profile and sends you to onboarding if you do not belong to an organization yet.
If sign in fails, confirm the account was verified from the email link.
Use Forgot password from the login page if the password cannot be recovered.
Onboarding / Step 03
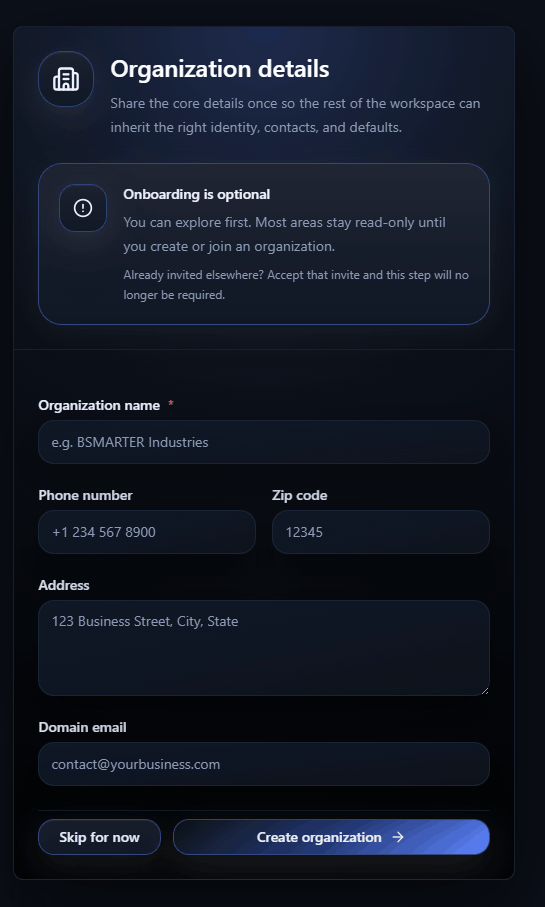
Create your organization
Create the workspace that will hold machines, staff, QA, bookings, faults, and reports.
Detailed actions
- 1Name the organizationEnter the organization name. This is the only required field for the first pass.
- 2Add optional detailsAdd phone, zip code, address, and domain email details if they are ready. These can be refined later.
- 3Create the workspaceSelect Create organization and wait for BSMARTER to create the workspace and default structure.
Expected result
Your user becomes the organization owner and BSMARTER redirects you into the calendar area.
If the page says you must be logged in, sign in again before returning to onboarding.
If you were invited to an existing organization, follow the invitation link instead of creating a new workspace.
Joining from an invitation?
Signup and login links can remember invitation tokens when your organization sends you an invite. If you already received an invitation, follow that link first so BSMARTER can connect the account to the correct organization.